
When the delivery status in Order Management is updated to [Shipped], you can print the shipping label and wait for the carrier to pick it up or use drop-off service (if available).
This article is the instruction for printing a single shipment label for an order. You can also generate and print shipping labels in bulk, please refer to: How to create multiple labels at once / Bulk print labels?
How to book a shipment?
OneShip requires to book a shipment before printing a label. There are 2 ways to book a shipment:
1. Book a shipment from synced order
Please navigate to [Shipments] > [Order Management] and click on the “Shop Order Number”.
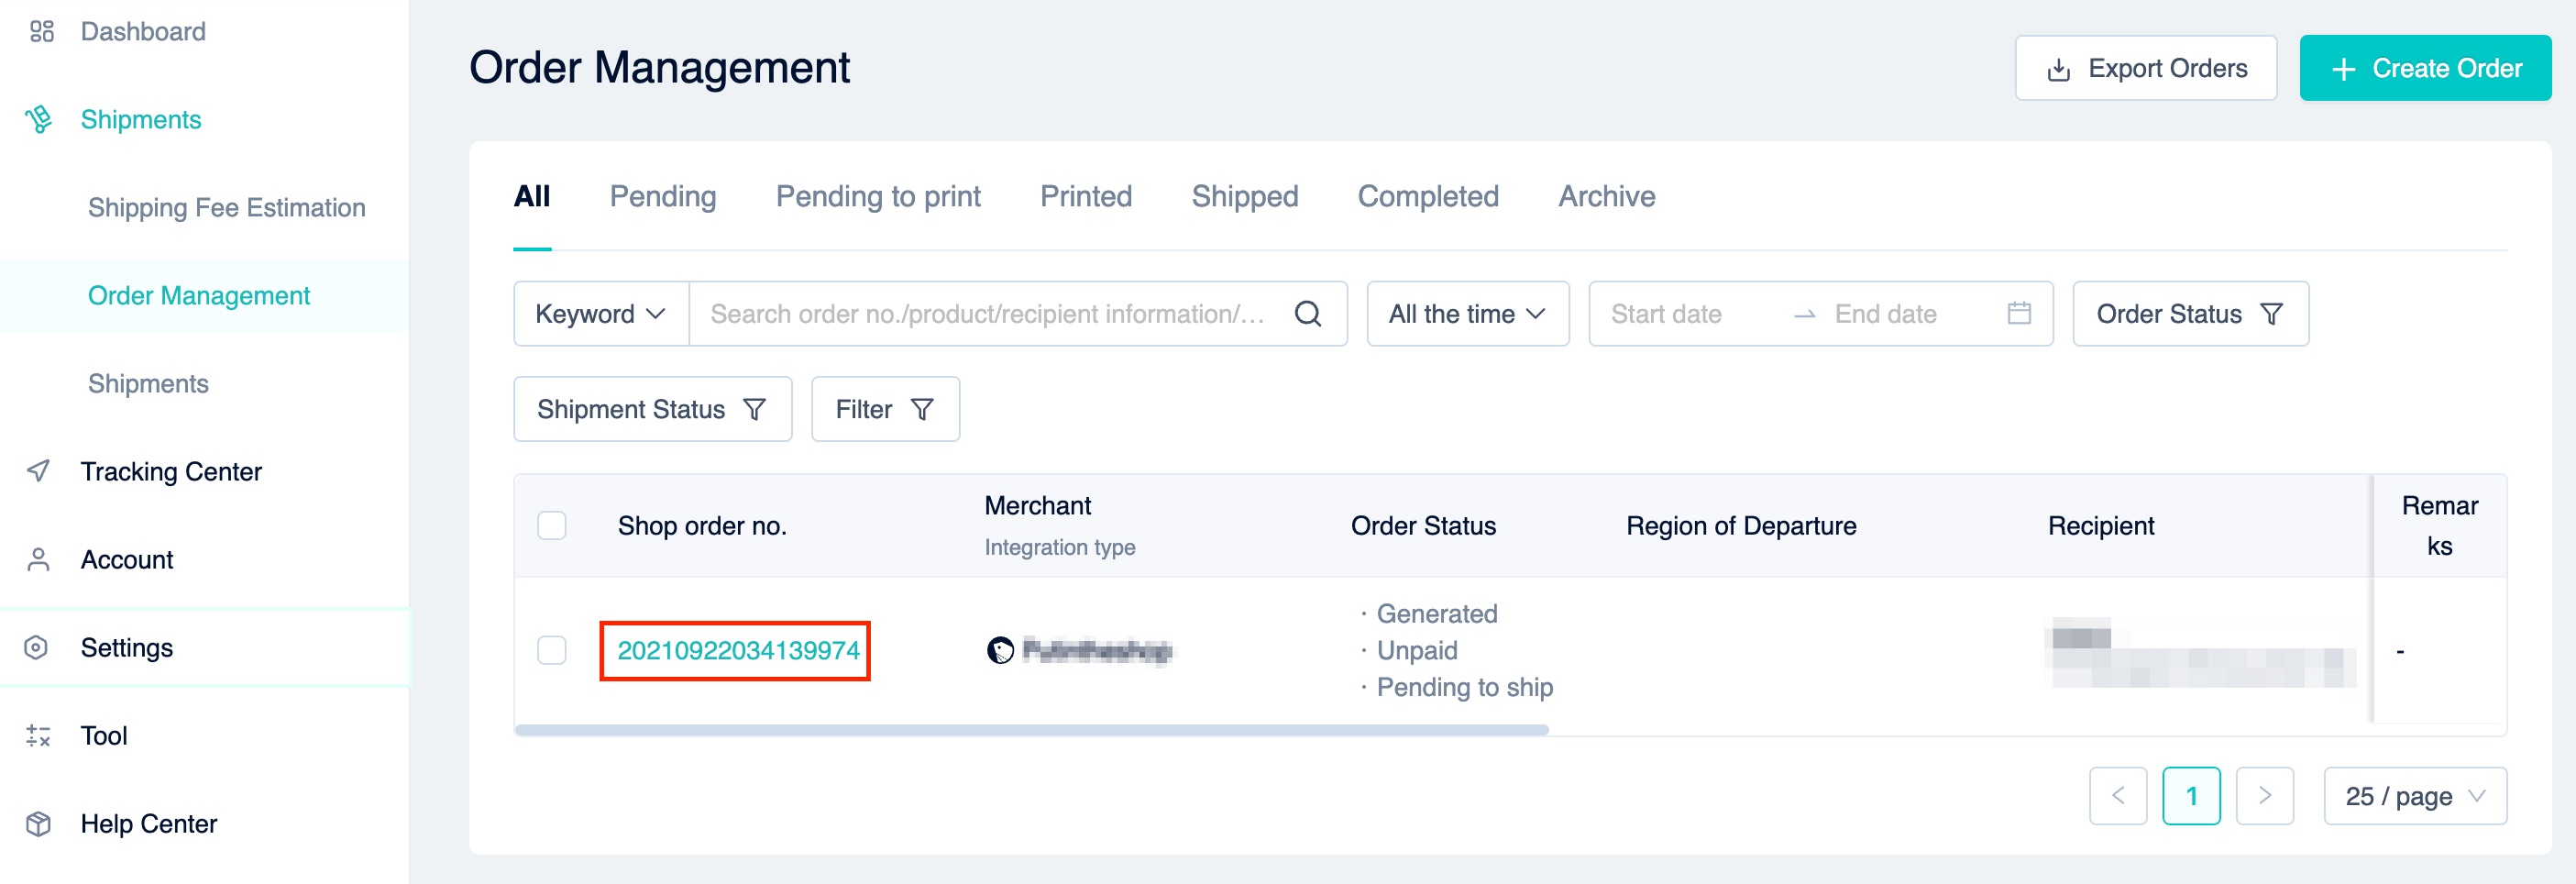
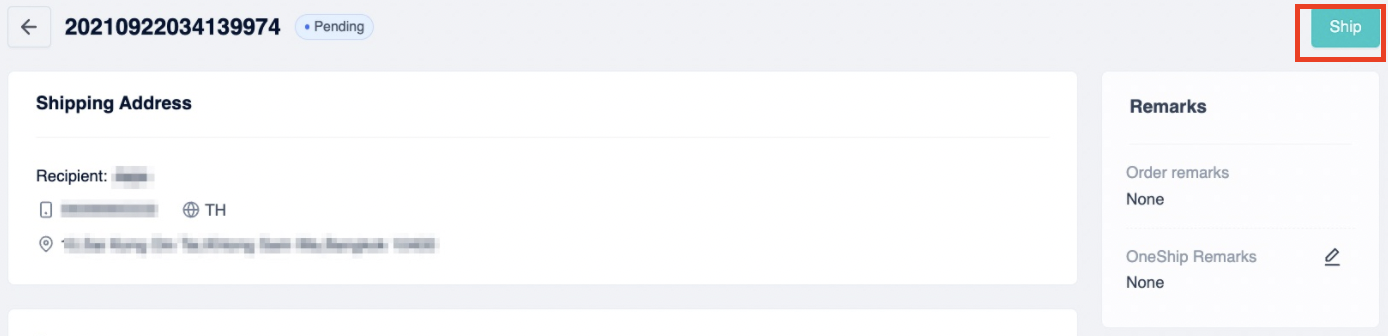
Click “Ship” to execute the shipment then fill in all required details. After that, the delivery status will change to “Shipped” and OneShip will auto-generate a label for you.
For detailed information please refer to: Order Management instructions.
2. Manually create order
Please navigate to [Shipments] > [Order Management] page and click “+Create Order” > “Create Order” at the top right corner.
For detailed information please refer to: How do I book for a single shipment?

How to print a single label?
Step1: Shipping label settings
Please navigate to [Settings] > [Other Settings] and find “Shipping Label Settings”.
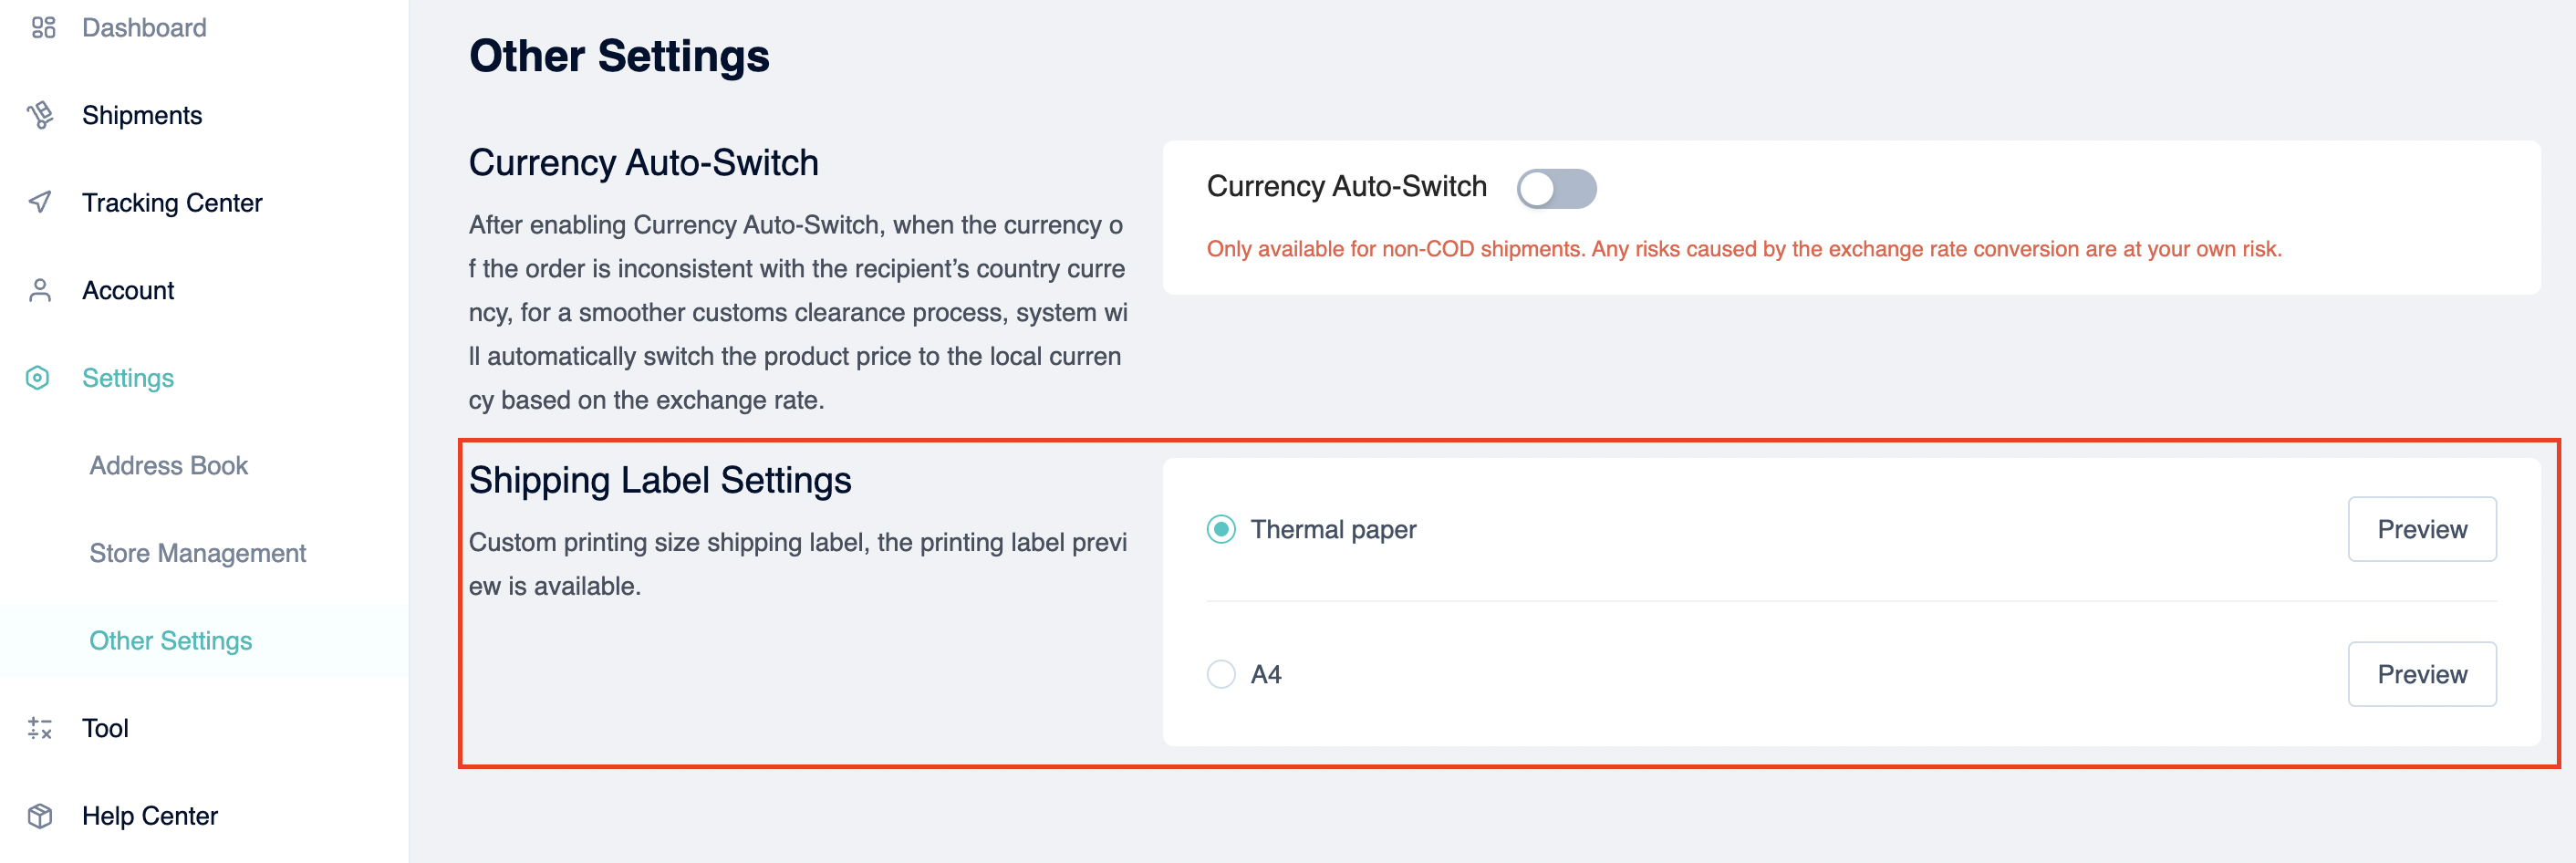
You may choose to print labels by using “Thermal paper” or “A4 paper”.
- 1 label for 1 thermal paper. Example please click HERE
- 2 or 4 labels for 1 A4 paper. Example please click HERE
Note: The label format might be varied from carrier to carrier.
Step2: Printing a label.
Please navigate to [Shipments] > [Shipments] then select the shipment you wish to print out and click “Print Label”

Note: The selected shipment’s delivery status has to be “shipped” otherwise print label cannot be done.