This article explains how to manually book a single shipment. If you have multiple shipments that are going to use the same carrier, please refer to: How to create shipments in bulk.
How to book a single shipment?
To book a shipment, firstly please navigate to [Shipments] > [Order Management] page and click “+Create Order” > “Create Order” at the top right corner.
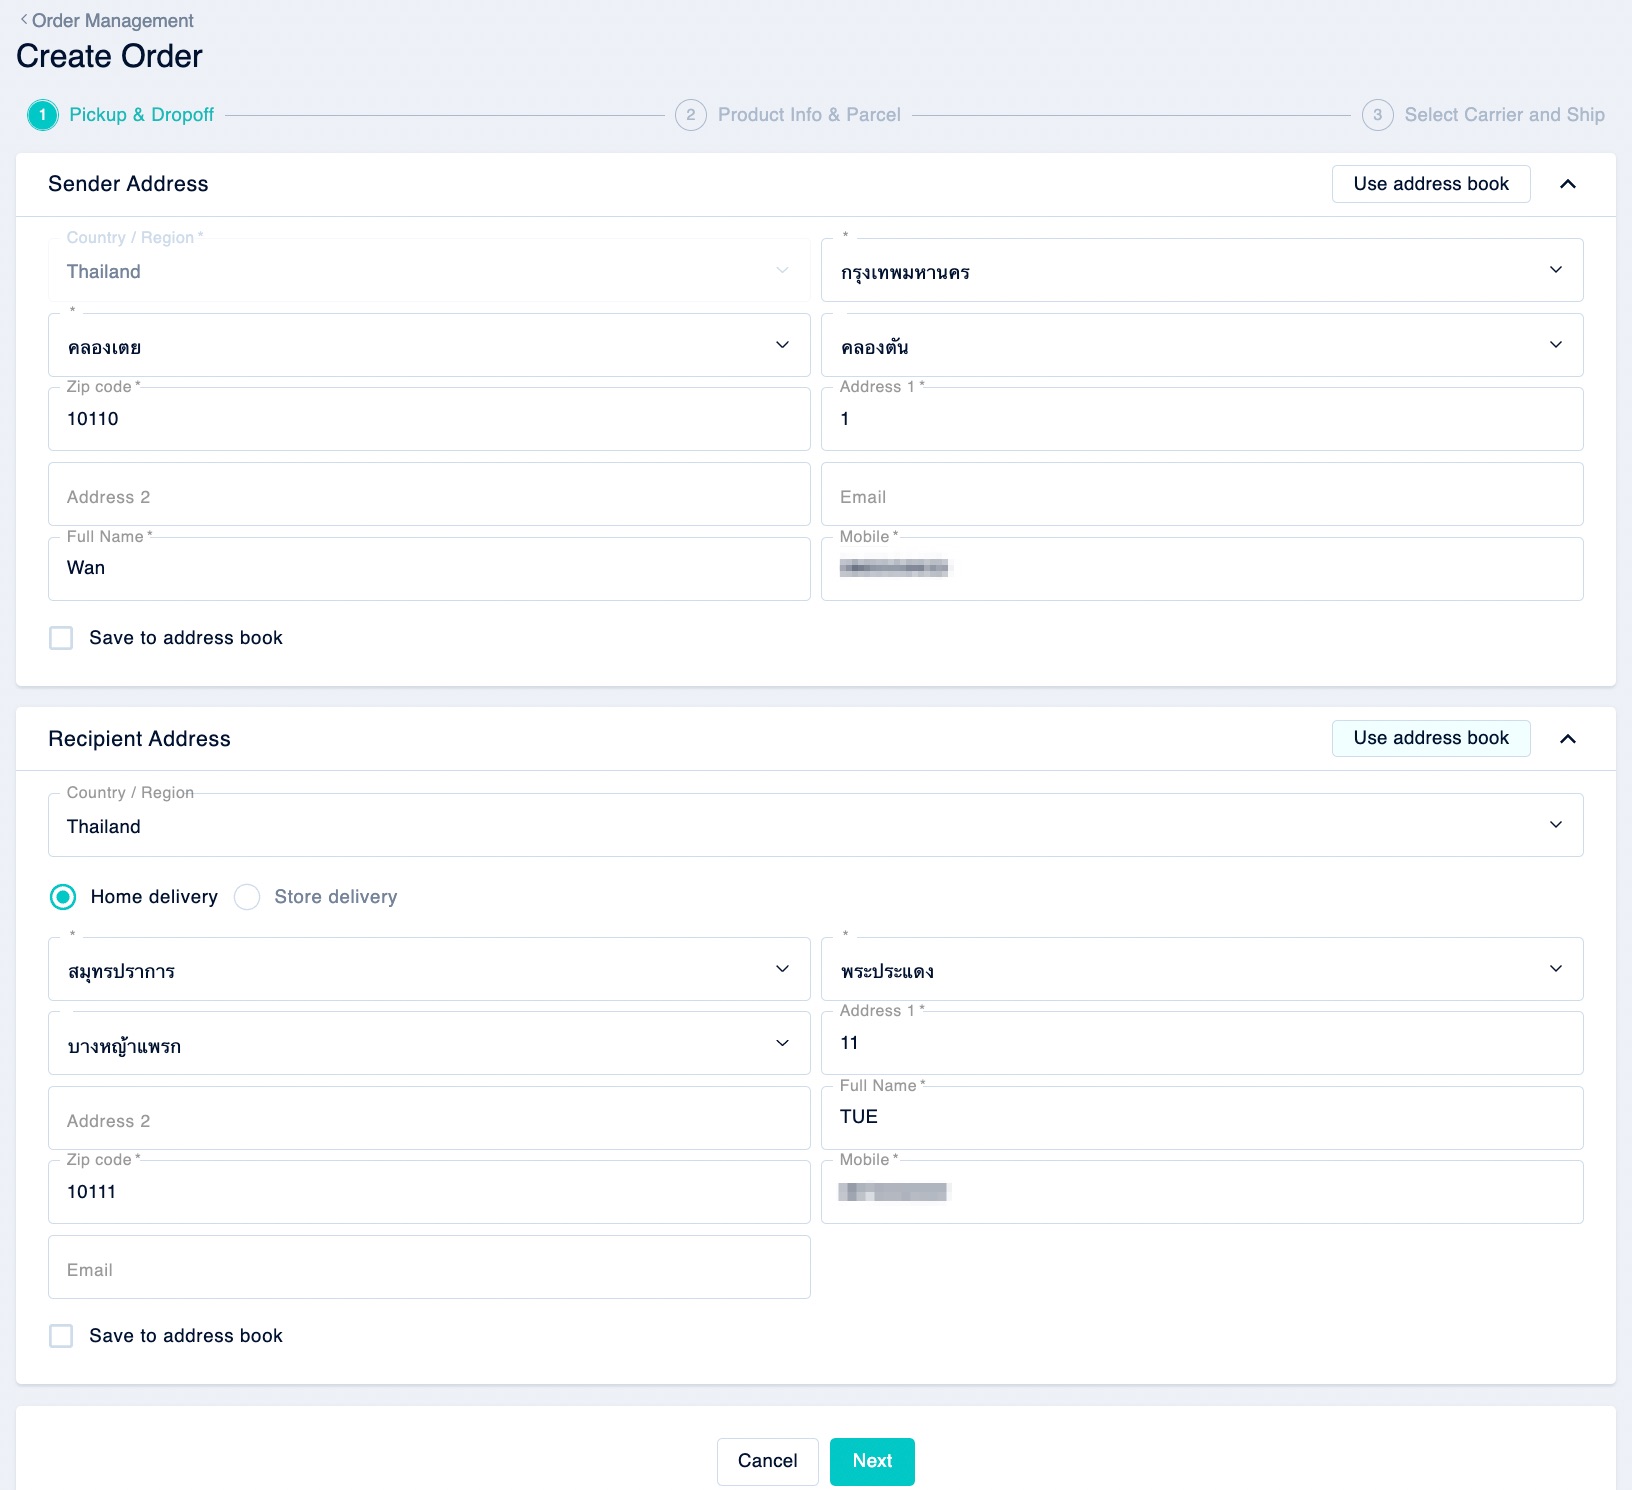
Step 1: Fill in Pickup & Dropoff information (sender and recipient addresses)
You can fill in manually or select a saved address from the Address Book, you may also choose to save this new address in the Address Book > Click “Next”.
Note: Please check carefully that all details are correct to make sure your parcel will be delivered to the right person.
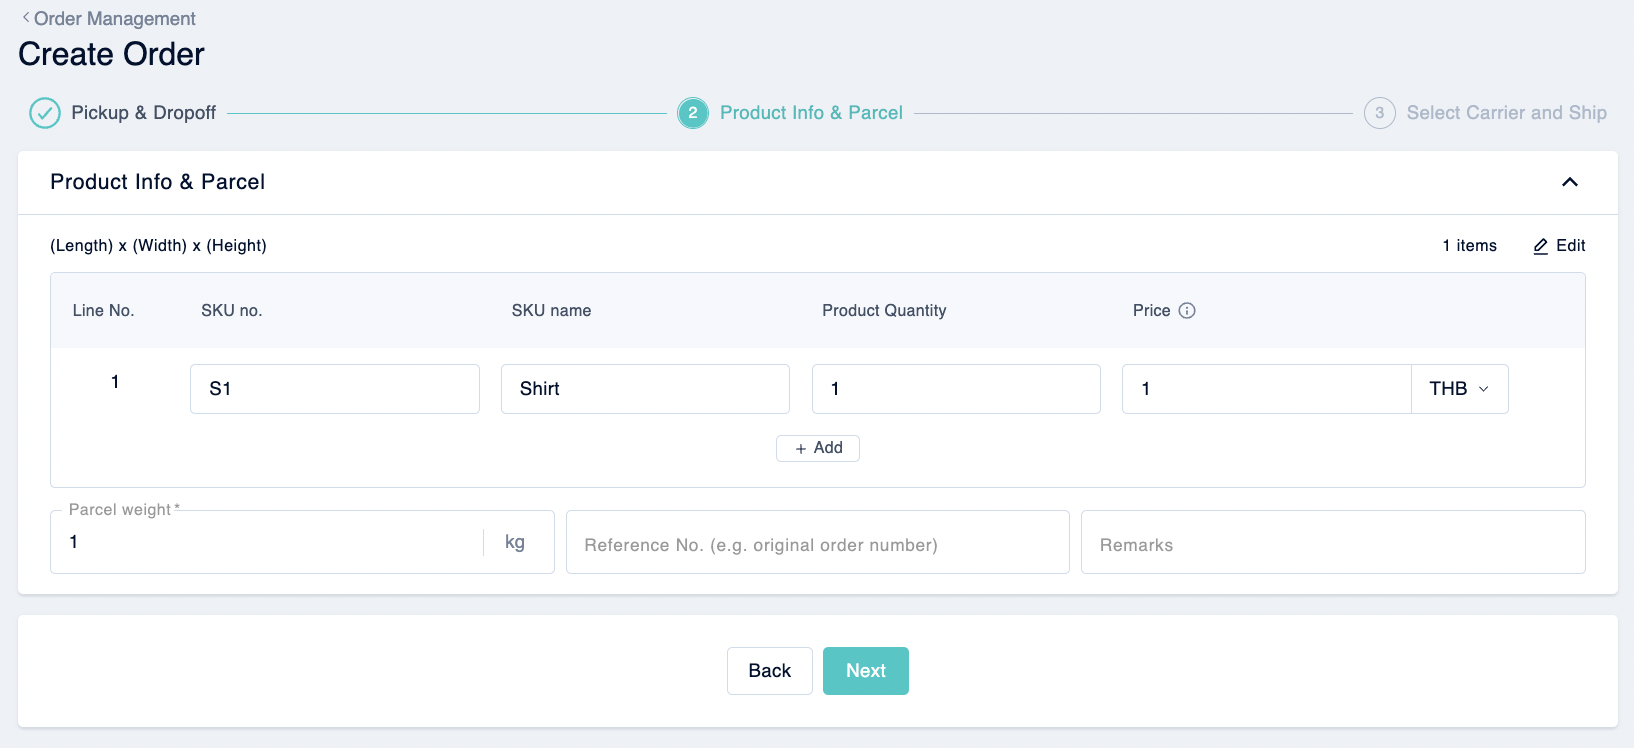
Step 2: Fill in Product Info & Parcel information
Enter your parcel details such as SKU, quantity, price, and weight > Click “Next.”
Note: 1 shipment in OneShip means 1 parcel. If you add several goods in 1 shipment, kindly pack them all in 1 container or box.
For cross-border shipment:
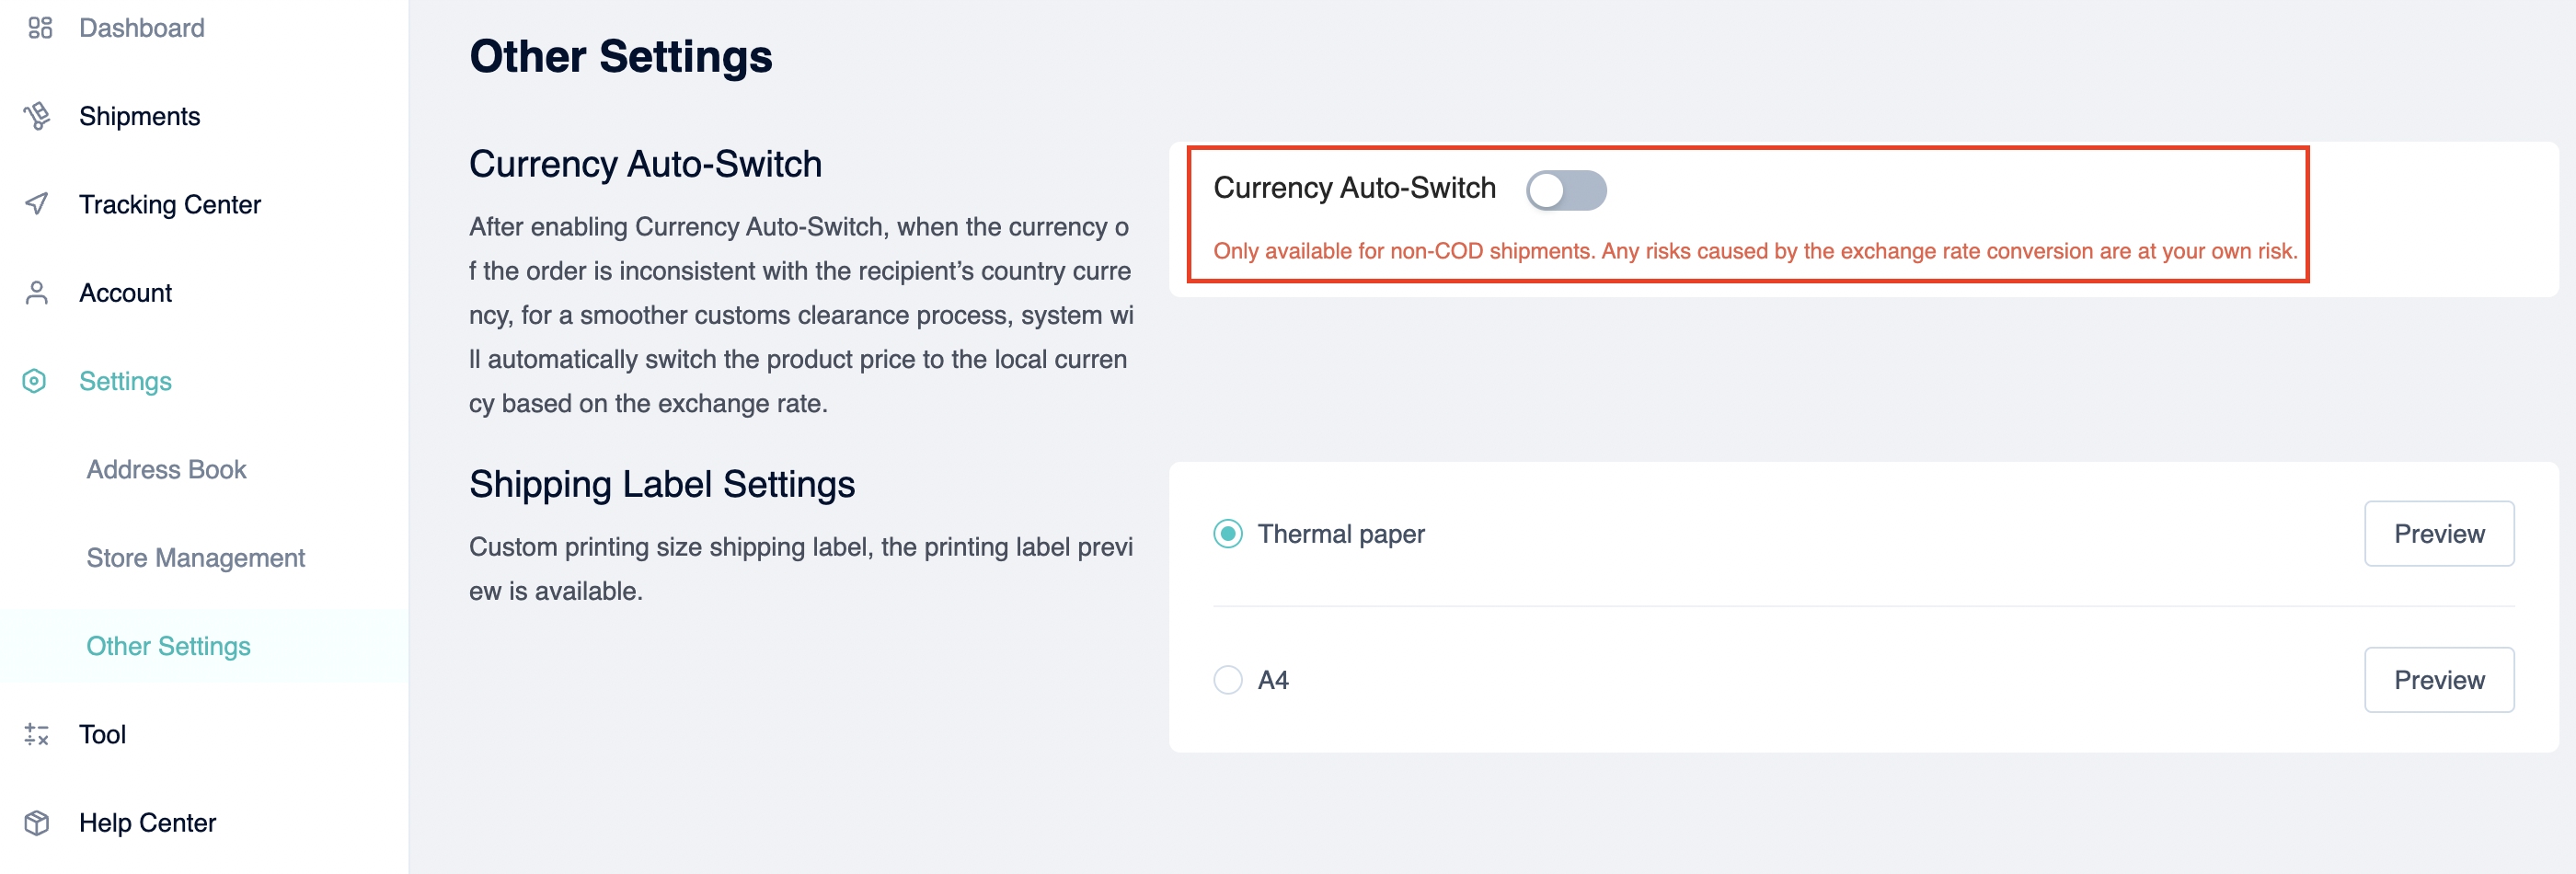
To facilitate the smoother custom clearance processes, you can enable “Currency Auto-Switch”.
Please navigate to [Settings] > [Other Settings]. Once the toggle is enabled, the currency will be automatically converted to local currency, based on the recipient’s country.
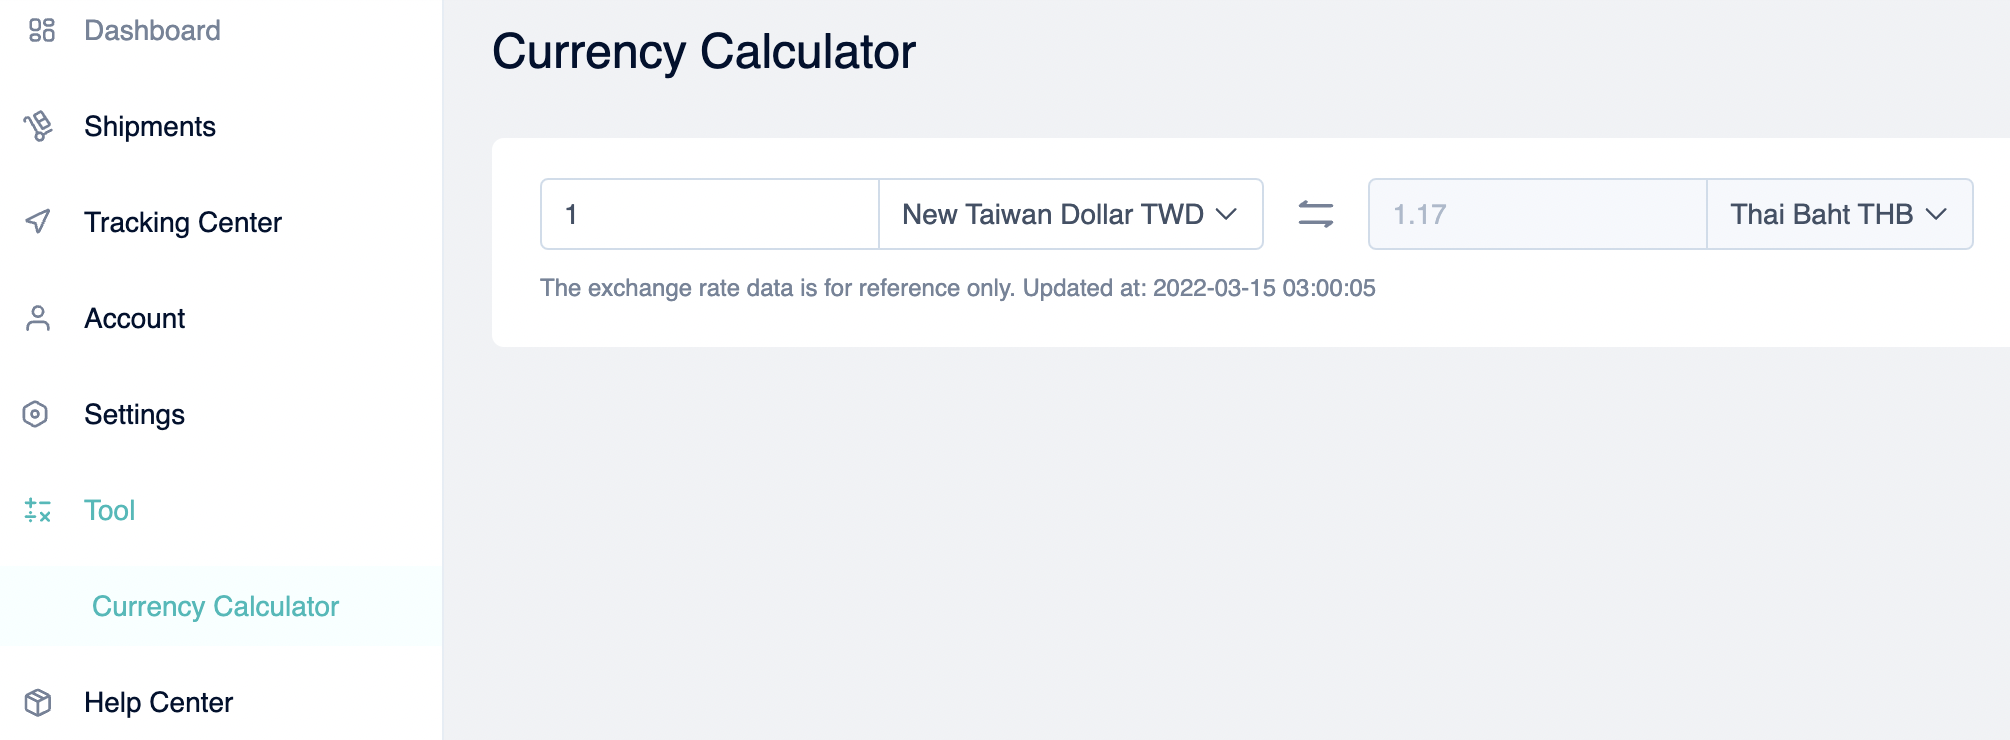
You may also navigate to [Tool] > [Currency Calculator] to check the exchange rate. The rate is updated every 4 hours.
Step 3: Select Carrier and Ship
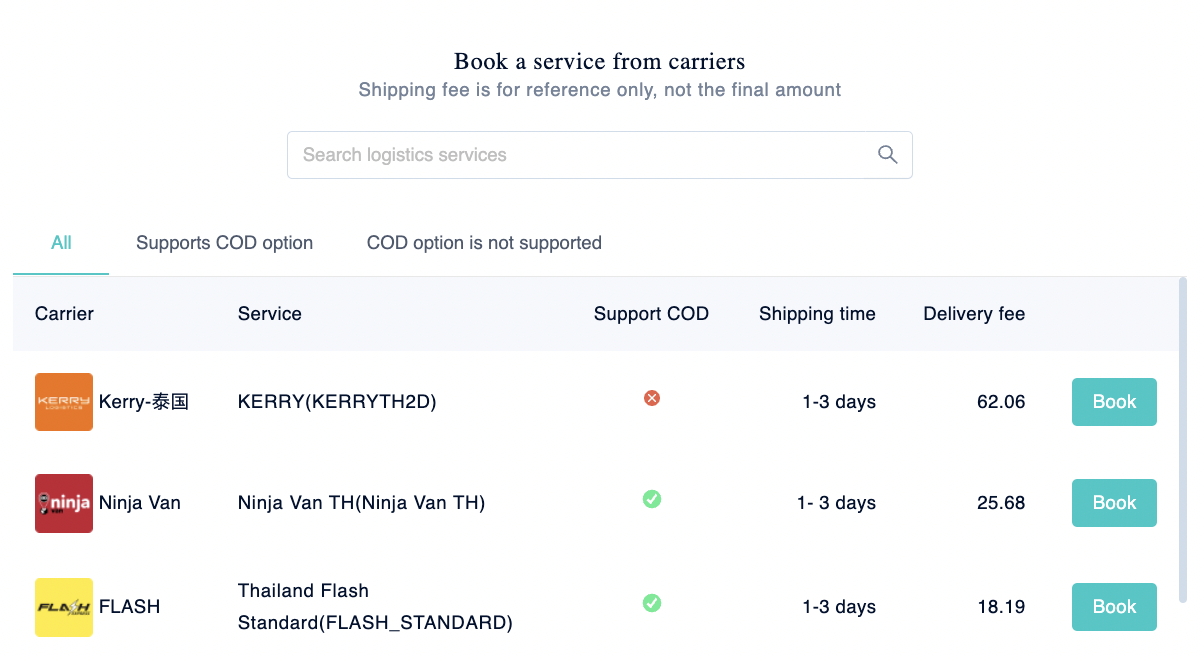
After filling in all parcel details, click “Book a service from carriers” column below.
The system will show all available carrier services, click “Book” to book the service that best suits you.
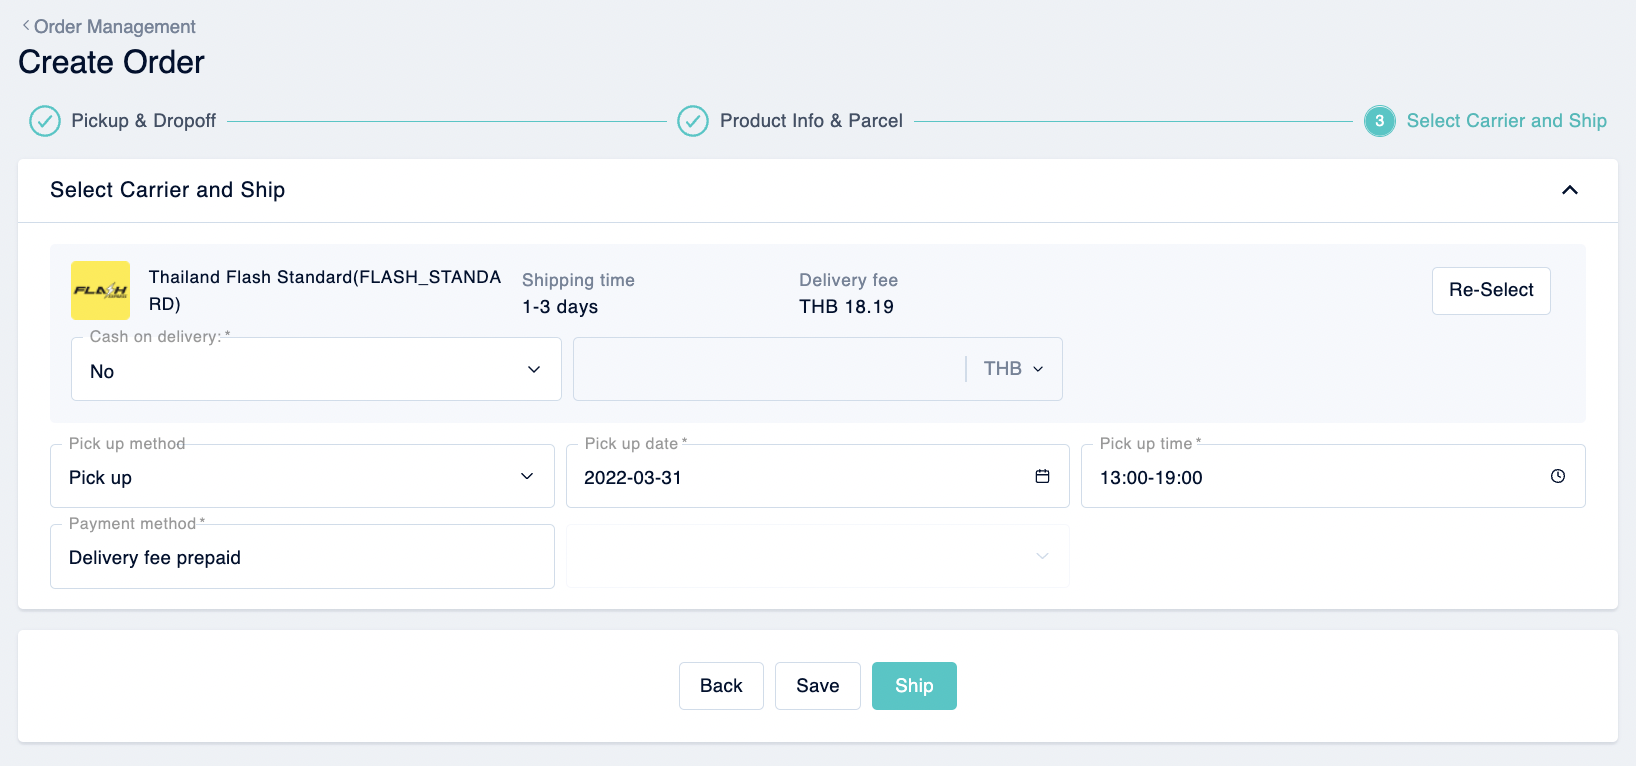
Enter your preferred pick-up method, date, and time. Then click “Ship” to confirm this booking. You can also save it as a draft for further editing later by clicking “Save”.
Note: You can only print out the shipping label once the status is “shipped”. For detailed information please refer to: How to print a single label?


